
In the English Board Studio interface, Rows distribute cards across horizontal bands, with headers along the left or right of the board.
Find the controls
Open Board Structure → Rows in the sidebar. Use + to add a dimension and its field selector to choose the Jira field.
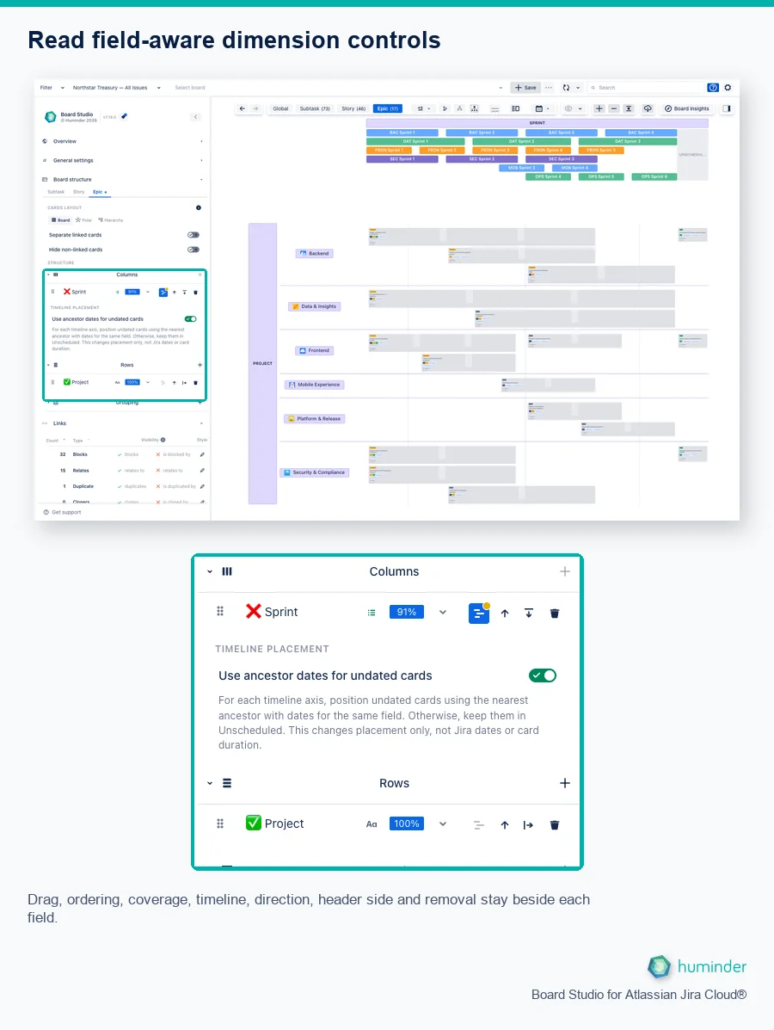
Drag, ordering, coverage, timeline, direction, header side and removal stay beside each field.
The drag handle changes nesting order; direction reverses field-value order; header position chooses Left or Right; delete removes the dimension from the view. The example also shows the separate Columns controls.
Add a row dimension
Start from the Status Columns example. Leave Status in Columns and keep the same hierarchy level. Adding Rows changes the view, not the Jira Priority values.
- Expand Board Structure in the sidebar.
- Expand Rows.
- Select the + beside Rows. Its tooltip says Add dimension: Rows.
- Open the new field selector and choose Priority under System fields.
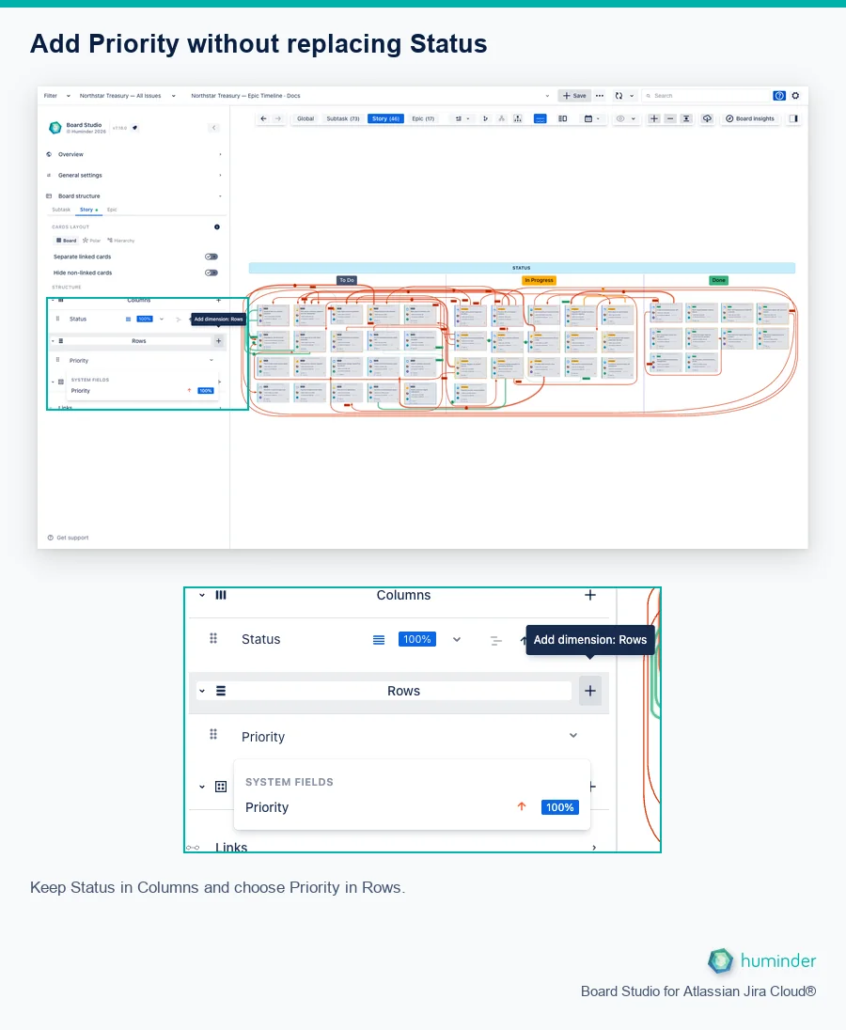
Keep Status in Columns and choose Priority in Rows.
Look for priority headings along the left or right and cards in their matching horizontal rows. Available fields depend on the loaded data. Start with one field; additional dimensions subdivide each row.
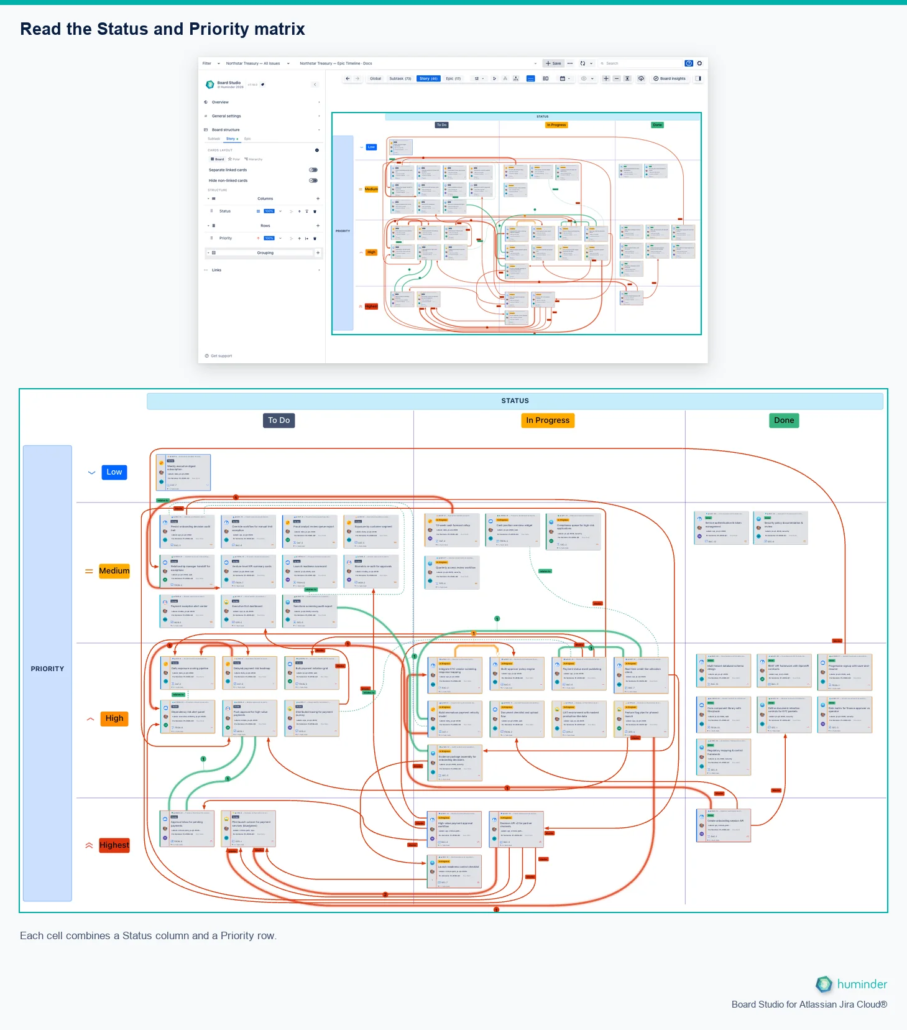
Each cell combines a Status column and a Priority row.
For example, the High row and In Progress column meet in one cell. Cards there have both values. The overview shows the whole matrix; zoom into a cell to read its cards.
Configure the dimension
Use the dimension’s direction control to switch between ascending and descending order. The start-position control places its headers at the Left or Right. Drag the handle to reorder dimensions, change the field in its selector, or remove a dimension with its delete button.
Cards without a value appear under Not defined. For time-based fields, see Timeline.
Combine rows and columns
For timelines and advanced layouts such as Polar, see Board Configuration.